Showing posts with label Preservation of paper. Show all posts

Wednesday, 6 January 2016

Paper Repairs with Japanese Tissue

Once the paper has been undergone aqueous  treatment, and has been strengthened, we need to take care of paper repairs before we can sew them back together.

 Let us look at the folios that make up a section. On the top right of this picture, we see that the folio has completely come apart. This is the outermost folio of a section, and is typically subject to the maximum abrasion. The next folio (bottom right) has also started to tear at the fold, and requires repair. Whereas, relatively, the two folios on the left side of the picture have not split at the fold, for they have been protected by the outer folios. In some cases, the paper between the stitching have weakened on the innermost folio as well. Each of these need to be repaired before the folios can be pressed and made ready for sewing.

 We make paper repairs with Japanese tissue, which is a thin, strong paper made from vegetable fibers. It has a high structural strength, archival properties and also has good wet strength as well. It is available in a range of gsm and come in various color shades. Selecting the right shade and tone of the paper to match the paper being repaired, will allow the tissue paper to blend into the paper and not show off a contrast.

We need to prepare strips of Japanese tissue paper for repairing the folded parts of the folios. We make use of a water pen to tear off thin strips of the tissue paper with frayed edges. Tissue paper cut with a scalpel show off a sharp contrast on the folios, whereas frayed edges make the tissue blend in. A water pen is like a regular pen, filled with water allowing water to flow out in minuscule quantities through a hair brush. Use a scale to prepare narrow strips of tissue paper - Ready as many strips of tissue paper as required. Once the tissue paper is wet with the water brush, just tear it apart with your hand so that the edges are frayed.


Use paste with Japanese tissue paper. As the tissue paper is very thin, lay them on a piece of transparent plastic sheet and paste them out. The same may be picked with with a tweezer and pasted on the folios. Should the folio have completely split apart, you may paste two strips of Japanese tissue, one on each side of the paper.

With so many folios to repair, it is more efficient to prepare a factory-like-setup. Cut several thin strips of Japanese tissue, bondina (30 - 70 gsm) and also thin strips of blotting paper. The sequence of layering the repaired folios is as follows:

  • Blotting paper
  •  Strip of Bondina
  •  Folio, repaired with Japanese tissue paper
  • Bondina
  • Blotting paper
  • Strip of bondina…and so on


 These layers allow the paste applied to the tissue paper to percolate through the bondina and get absorbed in the blotting paper. Once dry, the layer of bondina peels off the folios with paste, without sticking to it.


Where the folios have completely come apart at the fold, you may consider reinforcing the joint with Japanese tissue on both sides of the fold. This will thicken the folios at the spine, and will cause other problems later on (increasing the swell on the spine), but we will deal with that at a later stage.

It is important that there is a close color match between the color of the folios and the color of the Japanese paper, so that the repairs do not show. 


Clip off the extra length of the Japanese tissue paper at the head and tail of the folios.


Any tear in the paper may also be fixed with Japanese tissue as shown. Where edges are frayed and are breaking apart, the Japanese tissue may be used to strengthen the entire edge.


Once the folios are dry, separate the folios from the Bondina and blotting paper, and fold them back, and assemble the sections. Take extra care to ensure that all the page numbers are intact and in the right place.  


NOTE:

Rough guideline for thickness of Japanese tissue to be used: For paper tears though the text, use 5 gsm, so that it does not obscure the text. Paper tears on the edges may be repaired with 10 gsm or the like. Tears in the fold, which require additional strengthening may be repaired with tissue which are 18 gsm, 23 gsm, etc. 


Monday, 7 December 2015

Aqueous Treatment

Now that we have separated the book block, and disassembled the book into folios, we will proceed with aqueous treatment of the paper as part of the paper restoration process.

As this is printed paper, we can use water as the medium to float wash the paper. Should this be a work of art, or contain water based inks, a bath of ethanol is used to wash the same.

Aqueous treatment will achieve the following objectives:
  • Reduce acidity levels in the paper
  • Strengthen the paper, making it less brittle
  • Provide an opportunity to buffer the paper by adding using an alkaline solution
  • Undertake paper repairs, should any pages be torn
  • Reconstruct the spine
At the end of this process, we would have restored every folio to the extent possible, and be in a position to re-assemble the book.


Float Washing Trays


We will begin by float washing each folio - Yes, wash the paper in water!!!

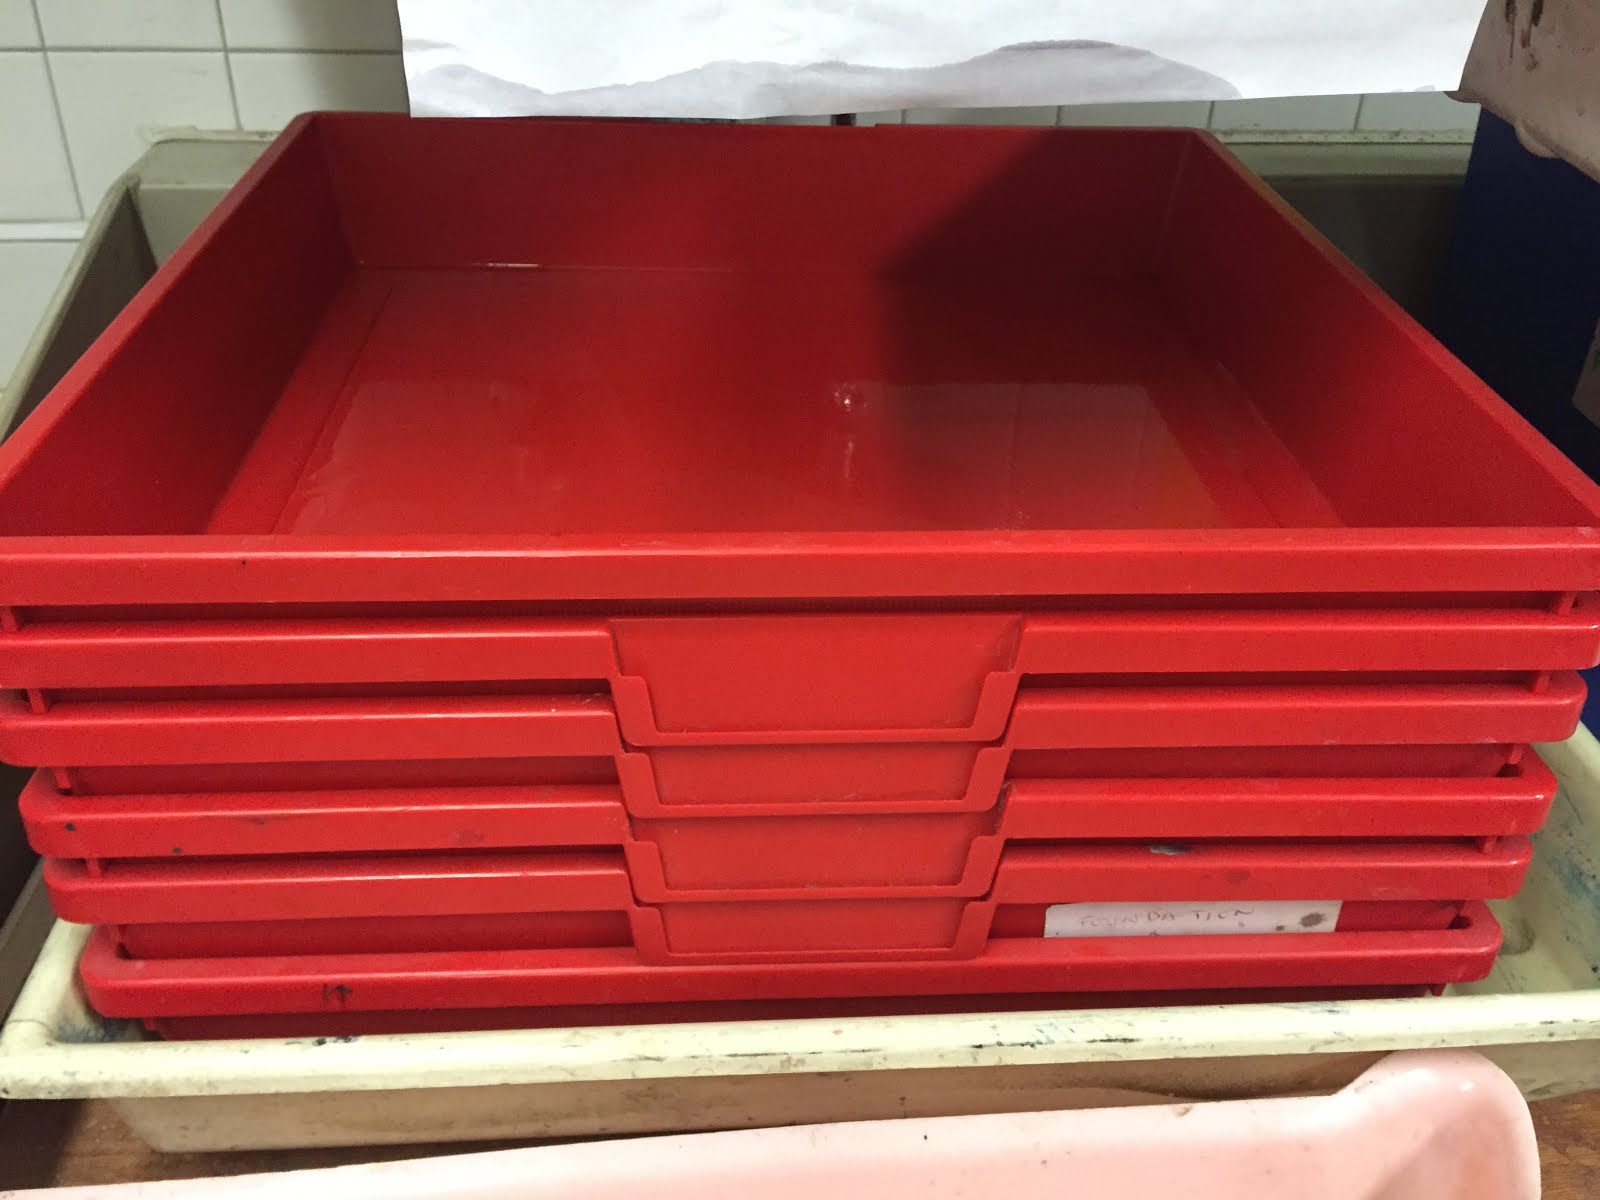
We will use plastic trays such as this, for the purpose. Fill the tray with warm water (Tepid). Normal tap water in London is pH neutral (pH of 7), and is suitable for the purpose. Distilled water can also be used.

Fill the tray with about 2 inches of water; and we are ready to float wash the folios.


Alkaline Solution

While aqueous treatment with pH neutral water will remove a certain degree of acidity, it is desirable to treat the water with an slightly alkaline solution (pH between 7 & 8) - so that the paper is alkaline buffered, on the completion of aqueous treatment, which will enable it to counter-act the effects of further acidification and ageing. Various chemicals are used for this purpose, such as Calcium hydroxide, Magnesium Hydroxide, Calcium bi-carbonate and Magnesium bi-carbonate. Expert opinion on which is the ideal chemical for alkaline buffering is varied. It is enough to say here that a pH solution between 7 and 8 is desirable for normal treatment.

NOTE: Bondina is a thin layer of polyster material used in book conservation. It is porous, allows water and glue to pass through the sheet, does not react to water, and most importantly, does NOT stick to glue or paste. It is the ideal substance to be in contact with a surface that has been glued down, as it can be pressed, without any fear of the next layer sticking onto the glued surface. It is also used as a material through which a glued surface is boned down...


Prepare Folios for Float Washing


Place a layer of Bondina (30 - 50 gsm) on a flat and clean surface. Let the shiny side of Bondina touch the paper surface.

Place two folios from a section onto the layer of bondina. Spray a thin mist of water to relax the paper. The paper will start to curl up as soon as it absorbs moisture, along the grain direction!

Flip the folios, handling the wet folios with extreme care. Spray a thin mist of water on the other side as well. The curled folios will relax back onto the layer of bondina

Take the later of bondina, along with the folios and just lower it onto the water in the tray


Float Washing Paper


Repeat the process to build up to 6 - 8 layers of bondina, one on top of the other, in the tray. Since Bondina is a porous material, it will allow water to percolate into the layers, and will gradually wet the folios.


You can see that the ink is starting to run. This is bad practice. In reality, either the ink needs to be fixed with a spray, or with crystalline wax (pen), so that the ink does not run.

In this case, since this is more of a trial and learning for me, I push ahead regardless. Ssshhhh...

Place one more layer of Bondina on top of the top most layer.

Now, the set of bondina layers can be handled. Gently push the layers down, so that water can flow all around, and percolates through the layer of Bondina.

Allow it to soak for 10 - 15 minutes. This process of 'float washing' allows the acidity in the paper to be transferred to the water. Some level of acidity is removed, though not in its entirety.


Drying Racks

In the meantime, get a set of racks ready - such as the one shown on the picture, so as to allow the wet folios to dry.


Couple of more pictures that shows the construction of the drying rack... Loaded with springs, holding the racks in position.


Wait while Water Wets the Folio

Now, the water is seeping through the bondina, and the folios are fully soaked now. Dab the folios through the bondina, so that the papers get fully soaked, and the water moves around a little bit.


Replace the Water & Start Again

After about 10 - 15 minutes, we remove the sheets so that the water can be replaced.

Just hold all the layers together, lift it up, and let the water drain back into the tray. Remember that there are layers of bondina on both sides of the set of folios, and so, we are NOT directly handling the folios ever.

NOTE: Wet folios are extremely susceptible to tear, and hence should NOT be handled directly. A layer of wet bondina may be used to lift a wet folio, move it around, and released in a new position.


Let the water drain from the wet folios.......And put the wet folios aside on a table, for a few minutes.


Discard the Acidic water

Discard water. The water in the tray does not seem to be discolored at all, but when we pour the water into the sink, we can see that the color of the water is pale brown.

Replace the water with tepid tap water again, and repeat the cycle once more. Transfer the wet sheets of bondina interleaved with the wet folios back into the tray, with fresh water. Dab, and let the water seep in for about 10 - 15 minutes.

Now, it is ready to be taken out and to be left to air dry.


Prepare for Folios to Air Dry


Remove the layers of bondina and wet folios and place it on a table.

Keep a set of archival quality blotting papers, 100 gsm, ready on the table. Make sure that the blotting papers are reasonably clean, and do not have ink stains. The last thing that we want to do is to have a stain transfer from the blotting paper onto the wet folios!


Each layer of bondina, along with the folios can be lifted up and reversed onto the blotting paper. The surface tension of water ensures that the wet folios stick onto the layer of bondina, and it does not drop off.

Now the layer has been placed so that the wet folios are in touch with the blotting paper.


Now, gently peel off the layer of bondina, so that the wet folios are resting on the blotting paper only. Be very gentle in handling the wet folios.


Air Dry the Folios

Wet folios on blotting paper... Put one more blotting paper on top of the wet folios, so that it is drying from both sides.


Layer each set of wet folios (Float Washed) on one drying rack.


More wet folios may be placed on a blotting paper to manage space better, and manage with fewer drying racks!

After an hour, flip each set of blotting papers, so that the wet folios now lie on the other blotting paper. Remove the blotting paper on the top, which would now be wet, so that the wet folio is now exposed to the air.

Some papers cockle when it dries. This is fine, as we will be re-assembling the sections and pressing them in a nipping press shortly - That will flatten it out !!!

225 pages... And we work with one folio at a time (that's 4 pages)... Takes a lot of time.

And if we are to take care to test every single ink mark, to see if the ink runs, multiple the time required by a factor of two.


But book conservation and restoration is a study in patience. And that remains my toughest lesson yet!

In my next blog, we will see how we can improve the strength and stability of the paper further. Read all about it by clicking here...